 Reviews


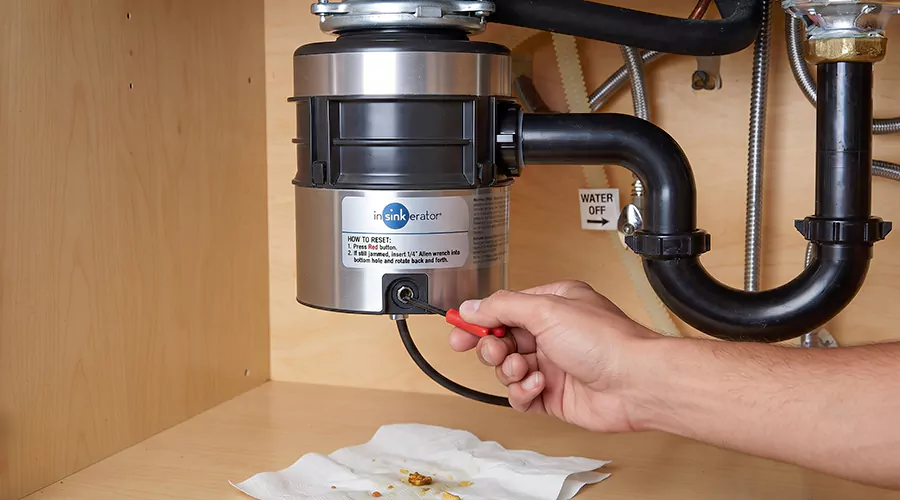
Installing a new garbage disposal takes two to four hours for a first-timer and saves the $189 average flat-rate labor charge professionals bill. The full pro version of garbage disposal installation runs $200 to $550 with most homeowners paying $300 to $450.
The project splits into four phases: removal and mount setup and plumbing and testing. Each phase has one trick that separates a dry cabinet from a slow leak.
Canadian readers know the identical project as garburator installation. The steps never change at the border.
Decide Replacement vs Repair First
Age answers this question faster than any symptom. Garbage disposal replacement wins once the unit passes 8 years or leaks from the bottom housing. Younger units with jams or electrical trips usually deserve the cheaper repair path instead.
The math draws the line. A unit over 8 years old or facing a repair above half the replacement price should be replaced, and food disposal replacement also makes sense when the roughly 10-year service life is close regardless of today's symptom.
Brand loyalty pays at the store. The fastest way to change garbage disposal units is a same-brand swap because the existing mounting ring often stays on the sink, which cuts the job nearly in half.
Insider Tip: Photograph the old unit's label before shopping. Matching horsepower and mounting system turns a four-hour project into a ninety-minute one.
Changing Out a Garbage Disposal
Changing out a garbage disposal starts with making the old one safe to touch. Power and water both disconnect before any weight comes down. Budget 30 minutes for a clean removal.
- Kill the power: Unplug the unit or flip its breaker, then verify with a voltage tester at the switch.
- Disconnect the drain: Loosen the slip nut where the discharge tube meets the P-trap with a bucket underneath.
- Detach the dishwasher hose: At the side port if one connects.
- Support and release: Hold the unit's weight or stack books under it, then rotate the body counterclockwise to unlock it from the mounting ring.
- Open the electrical plate: On the unit's base and free the wires on hardwired models. Photograph the connections first.
- Decide the mount's fate: Same-brand replacements can keep the old ring while brand changes mean removing the three screws and the snap ring and the flange.
Insider Tip: The snap ring pries off with a flathead at its split. Fighting it anywhere else bends the ring and your patience equally.
Set Up the New Mount
The mount transfers the unit's weight to the sink and its seal keeps the cabinet dry. Sink disposal installation succeeds or fails right here at the putty stage. Fifteen minutes of care buys a decade of dry.
Scrape the sink opening spotless first. Old putty residue under new putty creates the thin spots that weep later. Then roll a half-inch rope of fresh plumber's putty and ring it around the drain opening before pressing the new flange down into it.
Build the stack from below in order: fiber gasket then backup flange then mounting ring, and tighten the three screws by alternating sides for even putty squeeze. To install waste disposal unit hardware on an unusual or antique sink you may need a specialty flange, so check the opening size before assuming standard.
Insider Tip: Set the new disposal on top of the flange as a weight while you work underneath. The pressure holds the putty seal evenly better than any helper can.
Hang and Attach the Unit
The hang is the heavy moment and the lock is the satisfying one. You attach garbage disposal bodies with a twist-lock that clicks solid when the tabs seat. Everything wired happens before this lift on hardwired models.
Respect the weight honestly. The core of installing food disposal unit hardware is an overhead press with 10 to 15 pounds of motor, and installing a disposal unit goes far smoother with a second set of hands or a stack of books as a prop. Align the unit's tabs with the mounting ring and rotate clockwise until the lock lands with a firm click.
Give it the tug test immediately. A properly locked unit refuses to rotate backward without the wrench.
Garbage Disposal Plumbing Connections
Garbage disposal plumbing means two connections: The discharge to the trap and the optional dishwasher port. Both use gaskets and slip nuts rather than glue. Alignment beats force at every joint.
Work the drain side first. Bolt the discharge elbow to the unit's side outlet with its gasket, then connect the tube to the P-trap and hand-tighten the slip nuts before a gentle final snug. Trim the discharge tube with a hacksaw when it runs long since forcing an over-length tube cocks the trap sideways during garbage disposal installation.
The knockout finishes the garbage disposal setup. Tap out the plastic dishwasher plug with a screwdriver and hammer only when a dishwasher drains through the unit, and shake the loose piece out of the grind chamber after. A forgotten knockout is the number-one reason new dishwashers flood on day one.
Insider Tip: Dry-fit the whole drain path before tightening anything. Slip joints forgive repositioning right up until the nuts go snug.
Wire It Safely
Electrical work on this project is simple and unforgiving in equal measure. Corded units plug in and finish here. Hardwired units need the photographed connections rebuilt exactly.
Match wire to wire under proper nuts with the ground secured to the green screw. Codes add requirements worth knowing since waste disposer installation in many jurisdictions now requires a dedicated GFCI-protected circuit. Grandfathered outlets vary by area.
Switch placement rounds out the rules. Food disposal installation needs a wall switch within easy reach of the sink, and a missing switch means an electrician visit before the project continues.
Test Before You Celebrate
Every disposal installation ends with a wet test that takes ten minutes and catches everything. Water runs before power ever does. Follow the sequence exactly.
- Run the faucet full blast and inspect every joint with a dry paper towel. Towels reveal weeps that eyes miss.
- Fill the sink halfway and release it. Volume stresses the slip joints the way a trickle never will.
- Run the dishwasher a cycle if connected and watch the side port.
- Restore power and grind ice with cold water running. Listen for rattles that mean something dropped in during the install.
- Check the putty line above one last time for squeeze-out and trim the excess with a plastic putty knife.
A garbage disposal unit installation that passes all five checks is done for a decade.
What It Costs in 2026?
Replacement pricing rewards supplying your own labor and even your own unit. The table maps every 2026 path from full DIY to full service.
| Path | 2026 cost |
|---|---|
| Full DIY with your own unit | $75 to $200 plus $20 in supplies |
| Store unit plus bundled labor | Labor averages $189 as garbage disposal and installation together |
| Full-service pro replacement | $200 to $550 |
| New circuit by electrician | Quoted separately |
Time is the other honest number. Sink disposal replacement takes a pro about an hour while a careful first-timer fills an afternoon. Hiring a plumber to install garbage disposal units makes the most sense when wiring or corroded plumbing joins the scope.
When to Call a Professional
Three findings move this swap to a license. Each involves what feeds the unit rather than the unit itself. The mounting and plumbing phases stay DIY-friendly in nearly every kitchen.
- No existing outlet or switch: New circuits belong to electricians and may need permits.
- Corroded trap arms or shutoffs: Old plumbing that crumbles at a touch deserves professional replacement while the cabinet is open.
- A hardwired setup with unclear breaker labeling: Test-verified dead circuits are the price of admission.
One more case earns the call. A sink flange that spins in its opening means the sink's mounting surface failed and the fix runs deeper than any disposal.
Conclusion
A new disposal goes in the way the old one came out with one putty seal and one twist-lock in between. Removal takes half an hour and the wet test takes ten minutes and everything between them rewards patience over force. Wiring gaps and crumbling pipes belong to pros. This week check your unit's age on its label sticker. Past year eight the smart move is picking your replacement weekend before the unit picks it for you.
FAQs
Can I reuse the old mounting ring with a new brand?
Rarely. Mounting systems differ across brands so plan on the full flange swap unless the brands match.
Why does my new disposal hum but not spin?
Something dropped into the chamber during install. Kill the power and check for the knockout plug or a stray screw.
Does the putty need cure time before testing?
No. Plumber's putty seals on compression immediately which is why the wet test happens the same hour.
Should the discharge tube slope?
Slightly downward toward the trap. A level or upward run holds water and food inside the tube.
Can a handyman do this instead of a plumber?
For a straight swap on sound plumbing yes. New wiring or valve work moves it to licensed trades.
How long will the new unit last?
About 10 years with proper care. Cold water habits and ice grinding stretch the number.